Showing posts with label Parmesan. Show all posts

Thursday, November 8, 2012

Product Review: Toastabags

I'm not sure I ever thought I'd do a post that's a product review, but lo and behold here I am!  Awhile back my friend Jessi told me about a product she had seen called Toastabags -- little bags made out of a special material that you can use to cook a grilled cheese in a toaster.  Of course this made her think of me.  They looked interesting enough, but I wasn't quite ready to order them online.  Fortunately for us all, fate dealt me a lucky hand as I navigated the lesser-occupied pre-storm areas of my local Safeway and found my very own set of Toastabags!


I decided for my first trial run I didn't want to get too crazy, so I went with some old standbys-- grated cheddar on Pepperidge Farm sourdough.  In the spirit of a little fun I did use some butter to stick some Parmesan to the outside of the bread a la our Grilled Caprese sandwich.  So after assembling my sandwich I carefully shimmied it into the bag so as to try and not lose the cheese filling.


Despite what this photo appears to indicate, it was a relatively tight squeeze, but it worked well.  I can safely conclude that you could fit just about any average-sized sandwich bread in here.


Now it was time for the toaster.  I use my toaster pretty rarely (I didn't even have one until I looted a freebie from my friend when she was selling virtually all of her possessions), so I didn't really know what to go for in terms of ideal darkness setting.  Oh well!  Trial and error, right?  So I just set the dial to about the mid-point and stuffed the sandwich into the toaster.  This was DEFINITELY a tight squeeze, so even though most breads will fit in the bag, make sure your toaster will actually accommodate 2 slices of bread plus filling in one slot.


The Toastabag didn't actually go all the way into the toaster, so there was a good little piece peeking out for the duration of the cook time.


I realize that the lever is up in this photo, but I assure you that the sandwich really looked no different whether the lever was up or down.  At a point it was just too fat to fit anymore of the bag into the toaster.

Once the toasting was done I decided to show the top part of the sandwich some love and flipped it over to toast the portion that was formerly exposed during the toasting process.  I didn't allow this side to toast quite as long as the first run-through though, because I didn't want to burn the middle of the sandwich.  A few seconds/minutes later...


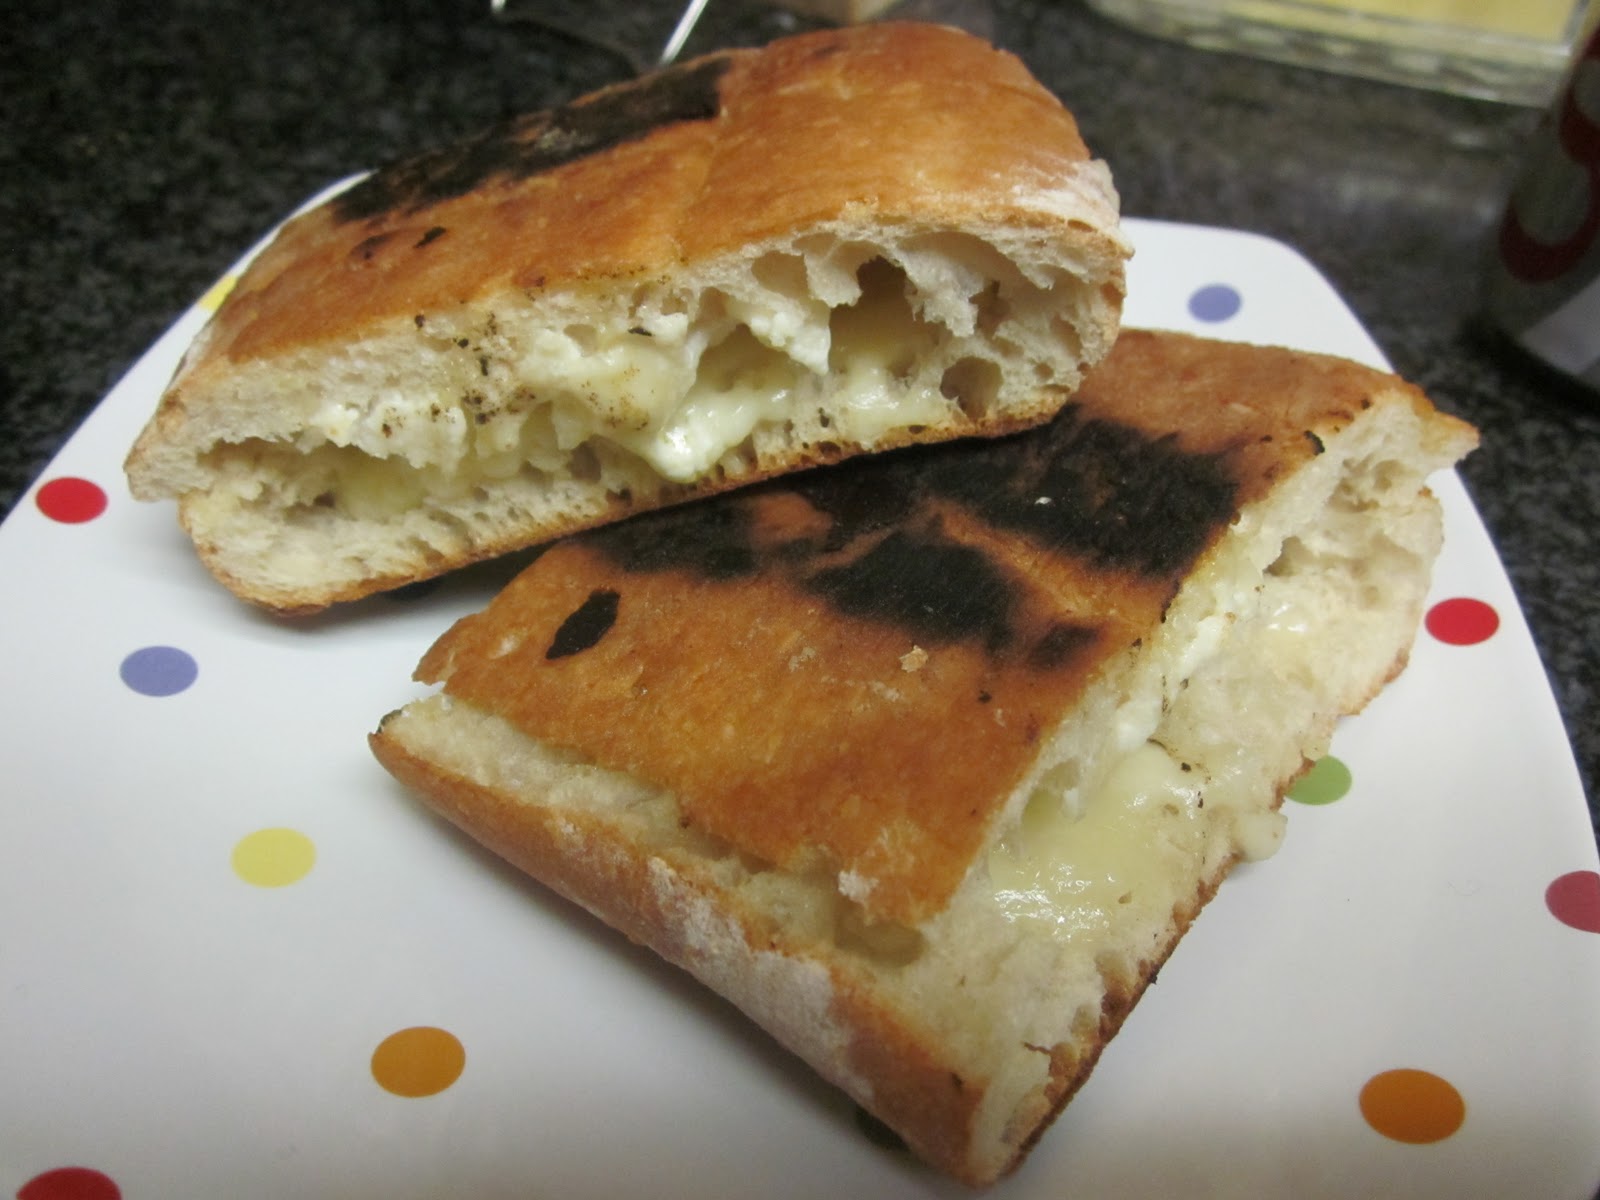
Voila!  Mixed results (one side lightly charred, the other not so much).  The cheese inside was definitely melted and the outside of the bread was toasted, so our primary objectives were achieved, but it wasn't quite the same as your standard grilled cheese.  Even though I had put a little butter on the outside of the sandwich (which apparently isn't even necessary), the bread still felt a little dry-- like... well, toast!  Not to say that's a bad thing, just different.  It gives an overall lighter feel to the sandwich.  That's really the only key taste differential. 

I think the real focal point here is the actual preparation process.  What was that infomercial with the tag line "Set it and forget it!"?  Well, that's basically what you can do here.  Instead of standing at the stove constantly flipping/covering/uncovering/flipping/recovering your sandwich, you just pop it in the toaster and get on with your life (for the next two minutes or so).  It's the lowest maintenance grilled cheese I've done (but then again, I don't have a panini press which I imagine involves a similar order of operations to the Toastabags).  The only clear logistical downside is the inability to fit too much filling/crazy ingredients into the sandwich.  We all know I've done some fatty sandwiches in the past (i.e. The Onion Ring Grilled Cheese, The Brunch Grilled Cheese, and The Pulled Pork and Fried Pickles Grilled Cheese to name a few), and clearly none of those would have been possible in my small-ish toaster.  So you either need to manage your expectations there, or get a big toaster. 

All in all I'd say these are handy in a pinch on those days that you don't quite feel like putting all the effort in to make a grilled cheese, or for bringing with you to make a grilled cheese on the go.  Could I have finally found the key to office grilled cheeses?!  YESS!

Thursday, June 14, 2012

Grilled Caprese

Including this week's sandwich, there are 20 sandwiches remaining in "Great Grilled Cheese" that I have yet to try and, in general, there's a reason I've been saving these for the end.  While roast beef with cheddar and blue cheese butter may sound delightful to many, I don't eat beef and I don't like blue cheese and thus have been avoiding this sandwich, and others like it, all along.  Fortunately, this week's selection was one of the few remaining choices that makes my mouth water. 

In general, caprese salads/sandwiches/whatever seem to be fan favorites, so the idea of putting it on a grilled cheese is, naturally, an appealing prospect.  So let's get right down to it.


Ingredients included:
* Crusty Italian bread (in this case I opted for a Wegmans specialty item-- Garlic Tuscan Bread)
* 6 ounces fresh mozzarella (in my case 8 ounces-- you know how I love the cheese!)
* 1/4 cup sun-dried tomatoes
* 2 Tbsp. dry jack or Parmesan cheese (in my case Parmesan & Romano)
* 2 Tbsp. chopped basil leaves (in this case pulled from our newly acquired home grown basil plants!)
* Olive oil

Step one was letting the tomatoes sit in very hot water for 15 minutes.  I still have zero idea why this step was necessary, but who am I to question GGC?  Maybe I was supposed to get dry tomatoes (the kind not packed in oil) and use the hot water to soften them up?  No idea.  Oh well!  After I had microwaved a half cup of water for 1 minute, in went the tomatoes.


I then turned on my broiler.  Yes, the broiler.  I wasn't sure where we were going with this step, but high heat makes me nervous!  Oh well, again-- I trust GGC.

YOWZA!
Next it was time to chop the basil-- I picked about 15-20 leaves and went to work.


By the time I finished this the tomatoes weren't quite done with their bath yet, so I took this opportunity to grate the mozzarella.  Once I had finished that it was time to remove the tomatoes and chop them.


After everything was chopped and grated I mixed all of the ingredients together.  Is it sad that I'm only now realizing that caprese salads have the same colors as the Italian flag?


Now we're ready to make the sandwiches.  After brushing one side of four slices of bread with olive oil I spread the cheese mixture evenly over the bread and topped them with another slice of bread, also brushed with olive oil.


After grilling each of the sandwiches it was time to brave an encounter with the broiler.  The recipe called for cooking the sandwiches in a heavy skillet that is oven safe but, since I don't have a skillet that meets that description, I opted to use a cookie sheet.  I put each sandwich on the cookie sheet and sprinkled the Parmesan on top.


Next it was into the broiler for 30 seconds to a minute or until the cheese is bubbling and starting to turn brown.  Well, before I hit that mark I heard my cookie sheet make a loud noise as it sort of buckled in the oven.  Fearing for its safety I removed the sandwiches shortly thereafter.  The cheese had melted, but not quite browned.


Once the sandwiches had cooled briefly, I plated them and was ready to chow down!


Taste Review:

Aside from an extra hint of charred bread courtesy of the broiler, there wasn't really an aroma for this one.  The sandwich looked very appealing with some nice color to the inside and the extra cheese on the outside (a step I'll need to repeat in the future).

The mozzarella is, of course, the perfect cheese for this sandwich.  It's creamy and provides the right backdrop to blend evenly with the other flavors.  That creamy inside was set off by the crispy exterior consisting of the crunchy crusty bread and the crispy bits of cheese.  I like that the cheese on the outside gave a hint of sharpness, but just enough to compliment rather than overwhelm the milder mozzarella.

I was able to pull Colin away from "Dogs in the City" for long enough to hear that he would've liked a little more tomato from a texture standpoint.  It's true, the filling is quite creamy, but I like that.  I think we've gotten used to lots of sandwiches with "stuff" in them, so although this sandwich was a little simpler I do think that was a good thing.  But in thinking about his desire for more tomatoes we pondered whether sun-dried is really the way to go and we think that it is.  If this sandwich used regular tomatoes there just wouldn't be enough flavor.  The basil would be the one and only standout ingredient.

The garlic in the bread was just a subtle hint in the crust, but it was great.  Again, just enough flavor to compliment rather than overwhelm the sandwich.  On the whole this makes me think of a panini I'd get at Corner Bakery (which, in my world, is a compliment-- I like Corner Bakery).  My only real criticism is that towards the end the sandwich starts to feel a little dry.  Perhaps because the bread is so crusty?  I'm not sure.  Maybe this could be fixed by adding a little more filling, but who knows.  I guess I'll just have to make it again and find out!


FINAL RESULTS:

Sandwich:
Grilled Caprese
Gooey-ness:
3.5
Aroma:
1.5
Appearance:
Nice and colorful with a cool cheese topping.
Taste:
A-


Gooey Scale
Aroma Scale
1 = still cold/hard
1 = can’t smell a thing
2 = slightly melted but still firm
2 = tender waft
3 = melted evenly
3 = makes your stomach growl
4 = melted and slightly runny (starting to get those cheese strings between your sandwich and your mouth when you take a bite)
4 = strong scent
5 = runny
5 = overpoweringly pungent
6 = sloppy mess!

Thursday, November 17, 2011

Garlic-Crusted Sourdough with Cheddar

Does the title already have your mouth watering?  Good, mine too.  Obviously I've seen this sandwich in GGC for quite some time, but have been "saving it" for an occasion when I was in the mood for a particularly tasty treat-- and that time is now!  This looked like a simple but super satisfying option, so it was perfect for a dreary Wednesday night.

The ingredients didn't deviate much from those of a no-frills grilled cheese: sourdough, cheddar, butter; but this recipe also called for 2 medium cloves of garlic and 1/4 cup very finely grated Parmesan.


These were all easy items to come by (so easy, in fact, that despite accidentally leaving my grocery list at home this week I was still able to recall exactly what I needed).

Step one was bringing about 3 cups of water to a boil in a small saucepan.  While the water was heating up I took care of peeling my garlic cloves and once the water was boiling, in went the garlic.  I must say I'd never thought about boiling garlic as a means of cooking it, but it sounded like a good way to mute a little of the punch that raw garlic tends to pack.


As that boiled I took care of grating ~8 ounces of the cheddar cheese I had selected (in this case, Wegman's brand 12 month cheddar).  I did a little taste testing as I grated (surprise, surprise) and found that this wasn't quite as sharp as the cheddars I usually go for.  Oh well, Pooh Corner taught me long ago that it's always good to try a little something new!

Once the garlic had boiled for 5 minutes I fished the cloves out of the water and squeezed them through my (newly acquired and already greatly appreciated) garlic press.  The ease with which the garlic was pressed was proof of the usefulness of the boiling step.


You may recall my excitement over the "cheese butter" creation I first tried as part of the Spicy Double Jack.  Well, little did I imagine that cheese butter can get even better!  That's right, this time I was making GARLIC cheese butter!  Ohhh babyyy. 


So to the pressed garlic I added 2 Tbsp butter and 1/4 cup finely grated Parmesan cheese.  After mixing that together I had a hard time controlling my urge to eat the butter directly from the bowl.  "Gross, you wanted to eat butter?!" you say?  Well, look at this photo and tell me you wouldn't want to do the same:


OK, fair point, the garlic cheese butter appeal is lessened by the lack of the live and in person garlic aroma, but you still can't deny it looks delicious!

And with that the prep work was done.  The garlic cheese butter gets spread evenly over 8 slices of bread, cheddar cheese is spread evenly over four of those slices (that are then topped with the other four) and we're in business!


As this sandwich was made on the Big (Grilled) Cheese's officially endorsed favorite bread of all time (Pepperidge Farm Sourdough), the sandwiches all grilled up perfectly brown in no time at all :-)  The only minor hiccup was the fact that having cheese in the butter makes the sandwich stick to the pan ever so slightly, so I had to be sure to gradually scootch the spatula under the sandwich to loosen it before flipping.


Taste Review:


Now, I know Keats has taught us all that "A thing of beauty is a joy forever," but I don't think he was taking into account perfectly cooked grilled cheeses when making this assertion.  These sandwiches are definitely things of beauty, but they will not be a joy forever as I couldn't wait to start snacking!

As having garlic in the name would suggest, the aroma was intense and DELICIOUS!  I love the smell of sauteed garlic and when the sauteing is being done as part of a grilled cheese making process well, sign me up!  But, the garlic would not allow itself to be contained to just producing a delicious aroma-- it also took over the flavor of the first few bites of the sandwich.  I LOVED the fact that the garlic flavor was so obvious-- it sort of reminded me of cheesy garlic bread, but Colin was lukewarm on its strong presence.

At first I was surprised that GGC chose cheddar for this sandwich since I was picturing it more like an Italian sandwich (maybe with some Fontina or something), but the cheddar is actually a perfect choice because it's able to stand up to the strong garlic flavor so that both are powerful, but equally so (like Kirk and Picard... can you tell sous chef came up with that analogy?)  You may recall my mentioning that this particular cheddar was less sharp than the cheddars I usually choose and, luckily, it actually proved to be the perfect fit to balance out the garlic!  As you continued to eat, the garlic started to take more of a back seat (that or you just got used to the flavor being there) and you started to taste more of the other elements (the Parmesan and cheddar).  The only note I have related to the Parmesan is that it makes the crust chewier than I thought it should be.  Perhaps if I cooked it longer it would get a little crispier?  But then I wouldn't retain the perfect golden brown char that the Pepperidge Farm Sourdough is renowned for.

Original American Grilled Cheese in that it was simple but tasty.


FINAL RESULTS:

Sandwich:
Garlic-Crusted Sourdough with Cheddar
Gooey-ness:
4
Aroma:
4
Appearance:
Looks creamy and classic!
Taste:
A-

I was torn between an A and an A-, but ultimately decided that while good, this sandwich didn't get me quite as excited as some of our A recipients have (i.e. Havarti and Dilled Cucumbers on Rye or the Italian Ham and Cheese).

Next week I'll try to cook up a little pre-Thanksgiving treat... even if GGC doesn't have a Thanksgiving-esque recipe, I'm sure I can improvise something ;-)

Thursday, October 6, 2011

Four-Cheese Italian on Ciabatta

After the extreme sweetness of last week's Hawaiian grilled cheese I decided this week needed to be a particularly savory treat. That means a sandwich with a lot of cheese on it-- and what sandwich fits that bill better than a four-cheese Italian sandwich? Yum yum :-)
The ingredients were easy enough to come by: 4 ounces mozzarella, 4 ounces Fontina, 2 ounces ricotta, 2 ounces Parmesan and a loaf of ciabatta bread.


The first step was combining the ricotta and Parmesan. The recipe called for finely grated Parmesan and I could see why-- as soon as I mixed these cheeses together the Parmesan blended seamlessly into the ricotta to the point that I couldn't even tell it was there. The recipe advised adding pepper to taste, but since the Parmesan has such a strong flavor on its own I felt like it was enough to counterbalance the bland ricotta.


Next up I took to cutting up the ciabatta bread-- first into four pieces, then in half horizontally (to make pieces for a sandwich). Then I went ahead and pulled out the filling to create wells for the cheeses. I have tried making wells before, but never quite had the right bread for it. Since this bread has such a hard outer crust it was actually very conducive to forming wells-- even when I pulled a lot of the filling out, the hard crust remained intact, so that was great!  It was like a little bread shell.


Once I had the bread all ready I drizzled some olive oil on the outer crusts and spread the ricotta/Parmesan mixture on four of the slices.


Next came the Fontina and mozzarella-- evenly distributed between the four slices.


I went ahead and grilled those for about 2 minutes on each side until the cheese was melted-- not a very exciting prep process or cooking, but easy is fine by me!  But, one tip for anyone making this sandwich would be to only create a well in one side of the bread.  With wells in both there wasn't enough cheese to fill out the whole center so the pieces of bread tended to not stick together.  You can do that or just increase the amount of cheese you put in the sandwich (my solution to everything, I know).


Taste Review:
Looking at the sandwich it actually looked pretty boring, and it wasn't giving off an enticing aroma, so I was skeptical.  The first bite I got had so much bread in it that it sort of tasted like a cracker-- this didn't help to diminish my skepticism. But in reality the excess bread is probably best attributed to the wells in the bread-- all of the cheese collected in the middle of the sandwich leaving the edges very bready.

Once I got to the cheese, things started to pick up a bit.  Since we didn't have any funky cheeses (we're still scarred from the blue cheese a few weeks back) the mild cheeses all blended together seamlessly.


Although it was gooey and delicious, it was a little bland/dry.  It reminded us both of a stromboli or calzone, but without the tomato sauce.  As such, the addition of tomato sauce (or, in Colin's case, Sriracha) would have done a lot for the sandwich. 

In fact, the mildness of the cheeses provides a nice foundation upon which a more elaborate sandwich could be built.  I could taste some garlic on my hands from my preparations of another meal earlier in the evening, and that actually enhanced the flavor a lot, but you could really go in any number of directions in terms of additives.  I might like some tomato and basil, Colin suggested ham, people who like salami might like that, etc. 


FINAL RESULTS:

Sandwich:
Four-Cheese Italian on Ciabatta
Gooey-ness:
4
Aroma:
1
Appearance:
Boring looking solid outer shell with gooey white cheeses inside.
Taste:
B+

Gooey Scale
Aroma Scale
1 = still cold/hard
1 = can’t smell a thing
2 = slightly melted but still firm
2 = tender waft
3 = melted evenly
3 = makes your stomach growl
4 = melted and slightly runny (starting to get those cheese strings between your sandwich and your mouth when you take a bite)
4 = strong scent
5 = runny
5 = overpoweringly pungent
6 = sloppy mess!


We really liked the sandwich, but it wasn't a standout on its own. We both finished the whole thing (which is an additional indicator of quality, we don't always finish) and thoroughly enjoyed it!  But, it could really be taken to the next level with some personalized flavor enhancements.

Next Week: I might opt to bring some veggies out of the fridge crisper and into a grilled cheese.

Thursday, September 1, 2011

Spicy Double Jack

Greetings, all!  This week's sandwich was a winner, so I'm excited to write about it.  Let's begin.  I let sous chef choose the recipe this week since he requested to come grocery shopping with me and he opted to go with the spicy double jack (no surprise, sous chef loves all things spicy).  There were only a couple of ingredients on our shopping list, but one (dry jack cheese) wasn't available at the store.  The cheesexpert at Safeway suggested that we try a plain Parmesan instead of dry jack (which is what GGC suggested as well-- and if two experts say it, it must be true).  So, barring that slight speed bump, we got everything we needed with ease:


All we needed was: sourdough bread, red pepper flakes, 6 oz. jack cheese and 1 oz. dry jack (or, in this case, Parmesan).

No sooner do I unpack the ingredients and ask sous chef to help me with grating the cheese than I hear "Yum, this cheese is good."  Sous chef has absconded with the Parmesan and took it upon himself to take a bite right out of the cheese wedge!


Come on now-- no one should be eating cheese straight from the wedge like that.


Oh!  I didn't see you there...erm... moving on.

Step one was grating the dry jack-- I only needed 1 ounce, so I grated enough to fill my 1/8 cup measuring cup (and then grated a little more for good measure).  I added that to a bowl along with 2 Tbsp. of softened butter.


Next I mixed this together to form my new favorite creation: cheese butter.


Oh baby!  The road to a heart attack never seemed so right :-)

Once that was done I moved over to grating 6 ounces of regular jack cheese and adding in 2 tsp. of red pepper flakes. 


At first I was thinking: 2 tsps?  For 4 sandwiches?  Surely this is too little.  But then I got a bite of some cheese that had a pepper flake attached and my mouth was immediately set afire.  I was reminded of Eddie Murphy in my favorite Saturday Night Live Skit: "James Brown's Celebrity Hot Tub Party."  See the clip below for reference.


So yes, it was "too hot in the hot tub," aka my mouth (OK, that analogy really made no sense, but whenever ANYTHING is too hot I always say "too hot in the hot tub" out of reflex and wanted to share this little idiosyncrasy with the masses).  The fact that the pepper flakes felt so hot may have something to do with the fact that I am slightly wussy when it comes to spicy things, but nonetheless, my fears that the spicy double jack wouldn't be spicy were laid to rest.

Next I buttered four slices of bread with the cheese butter and proceeded to top the non-buttered side with the jack cheese/pepper flakes combo.


Looking good!  Next came the remaining four slices of bread (also buttered with the cheese butter) and into the pan went the first one.  In addition to the usual hissing/cooking noises I usually hear, the sandwich was also making a popping sound at regular intervals.  I concluded this must be the cheese that was cooking to the outside of the bread and chose not to be alarmed.  Turns out I was right.

Since there was just cheese on the sandwiches they all cooked very quickly (because there was nothing impeding the melting of the cheese), so we were ready to eat in no time.


Taste Review:

There was a light aroma of bread with a light cheese crust, but not so much so that you would notice it if you weren't actively sniffing the sandwich.  The first bite I took had a little spice to it, but it didn't overwhelm me.  However, the spiciness was sort of cumulative in that the more that I ate the hotter my mouth felt.  I had assumed that the red pepper flakes would change the taste of the cheese (and just make it into something like pepper jack), but you can actually still taste the flavor of the cheeses themselves-- it's just that now your mouth is on fire too.  Well, MY mouth was on fire.  Colin said that it needed MORE pepper flakes.  So, when making this one, just season it with red pepper flakes to meet your individual taste preference (seeing as how I appreciate my taste buds and don't want to kill them, I'll stick with a lighter application).

The cheese butter makes for a more chewy crust than a crispy one-- I wonder if that has anything to do with the fact that this time the recipe called for blending the finely grated cheese into the butter to make a paste rather than sprinkling it on separately to make sort of an outer crust (like I've experimented with in the past).  Either way, it was delicious!  I love the taste of cheese that has been fried up right in the pan and this had that along with a nice little kick that Parmesan always provides.

Colin determined that he likes it better with salsa and thinks it's too plain otherwise (there's a shock).  But, I can sort of see his point-- since this is such a simple recipe (almost a classic grilled cheese were it not for the red pepper flakes), it's a bit of a blank canvas that you can dress up or dress down depending on your mood at the time.  I think it would taste great with some guacamole (probably because I wanted something to cool my mouth off), but I also liked it on its own.  Sometimes you have to appreciate simplicity :-)


FINAL RESULTS:


Sandwich:
Spicy Double Jack
Gooey-ness:
3.75 (I wanted a 4, Colin wanted a 3.5)
Aroma:
2
Appearance:
Looks like a classic grilled cheese except for the addition of little red specks.
Taste:
A-/B+
Note: I voted A-, Colin voted B+.  I think the discrepancy arose from the fact that he is less appreciative of a simple sandwich than I am (he was babbling on and on about how we should turn this into a hamburger...)

Gooey Scale
Aroma Scale
1 = still cold/hard
1 = can’t smell a thing
2 = slightly melted but still firm
2 = tender waft
3 = melted evenly
3 = makes your stomach growl
4 = melted and slightly runny (starting to get those cheese strings between your sandwich and your mouth when you take a bite)
4 = strong scent
5 = runny
5 = overpoweringly pungent
6 = sloppy mess!


Next Week: I'm travelling again, but several people have already highlighted an excellent field report locale for me, so stay tuned!