Friday, February 24, 2012

Black Bean, Zucchini and Monterey Jack Cheese Quesadilla

It had been awhile since we last tried a quesadilla, so I figured now was as good a time as any to dive back in!  There are only a handful of quesadilla recipes in GGC, so I picked the one that sounded most appealing: the Black Bean, Zucchini and Monterey Jack Cheese Quesadilla.  As usual, acquiring the ingredients was pretty easy:


3 medium sized zucchinis, ricotta cheese, monterey jack cheese, tortillas, oregano, red wine vinegar, black beans, a jalapeno, olive oil, and a small onion (not pictured).  Well, actually, the small onion was not included as I thought I had an onion in the fridge at home-- and I did!  But it was moldy :-(  Sadly I didn't notice my roommate's extensive onion stash until it was too late.  Oh well!  I resolved to forge ahead.

Step one was dicing the zucchini into approximately 1/4" cubes and sauteing it in a pan with 2 Tbsp olive oil.  This is the step where the onion would've come into play as well, but not this time :-(  Also included with the zucchini is the chopped jalapeno (stemmed and seeded, of course).


I let these cook together for about 8-10 minutes, or until the zucchini was feeling soft, but not mushy.  Once that was done I added in 1/3 cup of black beans and 2 Tbsp of red wine vinegar.


And stirred and cooked for a little longer while also preparing the tortillas for action (which just entailed removing the tortillas from their baggie and brushing olive oil on one side of them).


Finally came 1/4 cup ricotta cheese.  In this recipe the ricotta is intended to hold the zucchini/black bean mixture together, not so much to have an actual taste.


The recipe called for 4 burrito sized tortillas, but taco sized tortillas were on sale, so I think we can all easily deduce which I chose (I would just have to use 6 instead of 4).  I had grated 8 ounces of monterey jack and spread some on the bottom half of each tortilla.  To that I added about 1/6 of the zucchini mixture.


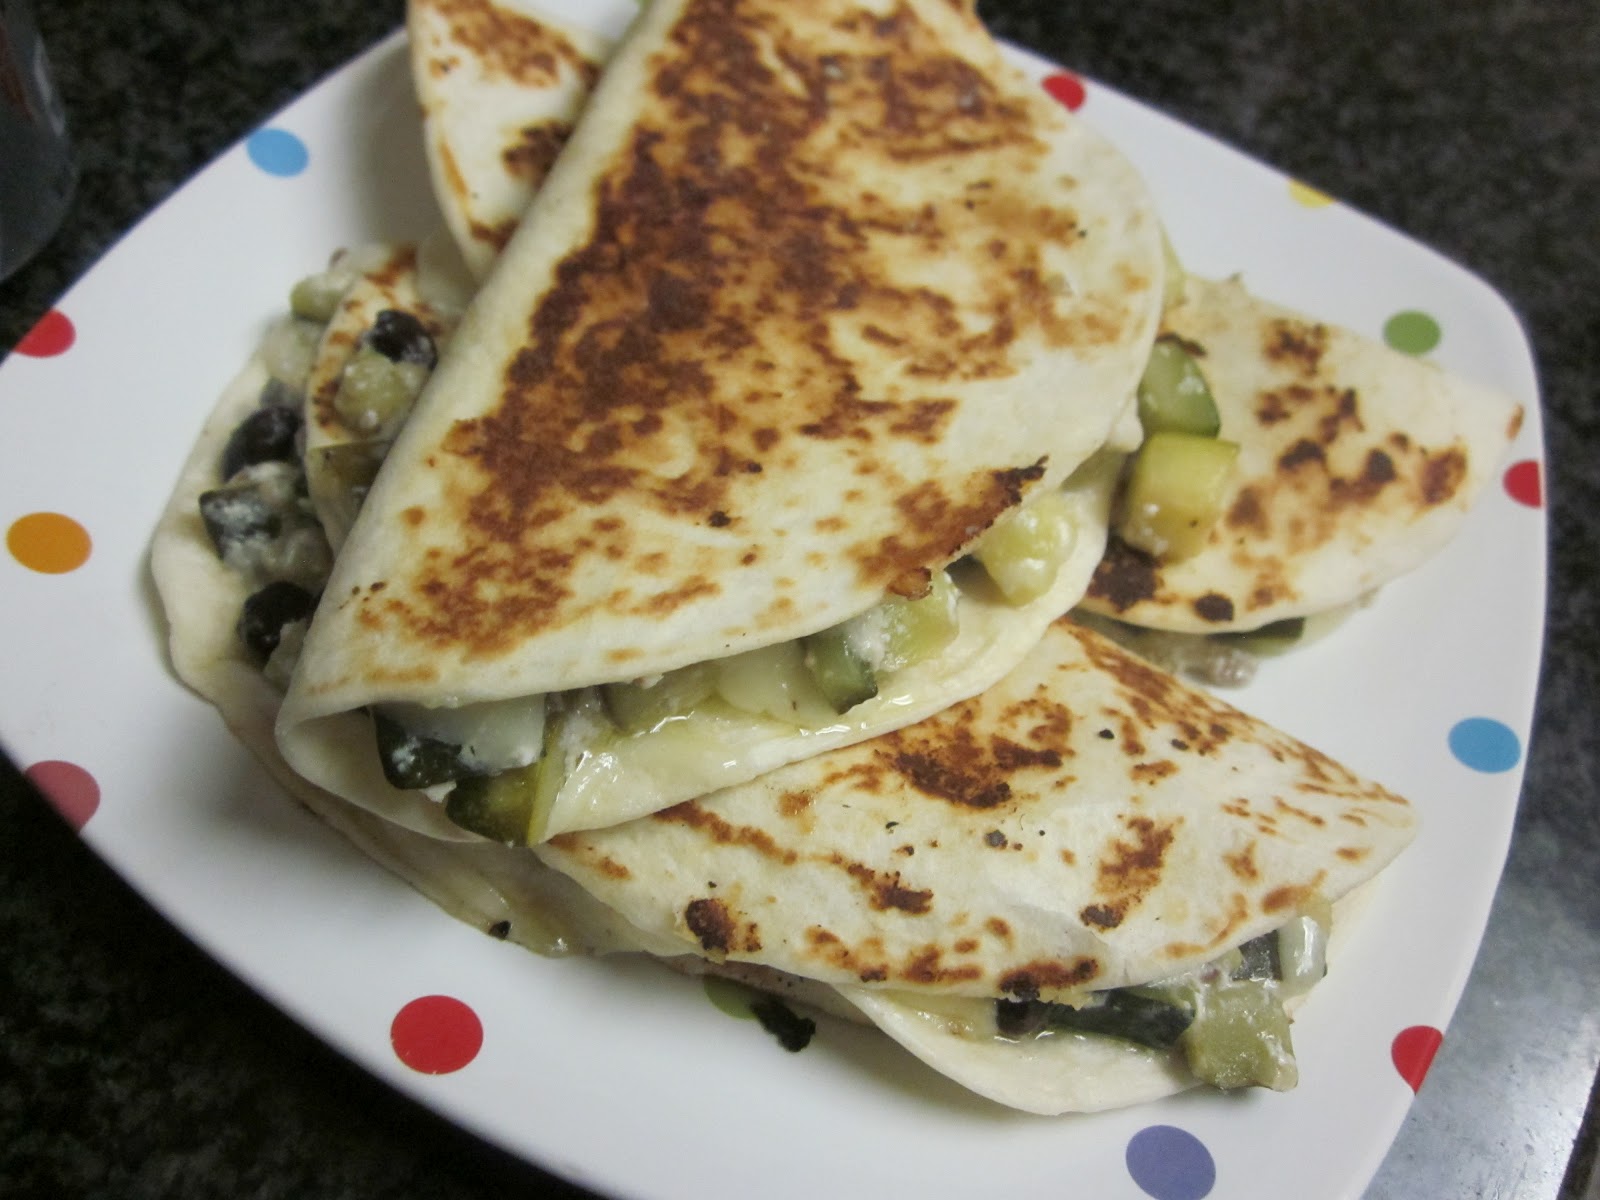
From there it was fold and fry! 


And in no time we were ready to dine.


Taste Review:

I was surprised at how strong the zucchini tasted-- it was the dominant  flavor from bite one (which is surprising because usually jack cheese makes its presence known).  Even though we had cooked the zucchini it wasn't mushy (like the eggplant got when we made this little number), it actually stayed pretty firm, so I was glad that the ricotta was there to provide some much needed creaminess.  But, zucchini as the star of the show meant that the quesadilla was actually sort of bland.  It needed some sort of spice (for once, sous chef's desire to add salsa to all foods wasn't off the mark).  Luckily we had some good chunky salsa we had used for some Mexican themed fondue on Valentine's Day and were able to add some to the quesadillas.  The addition of more vegetables via the salsa muted the zucchini a bit, but not in a bad way-- more in that the zucchini sort of became part of the salsa.

As hindsight is always 20/20, were I to go back and make this one again I would opt for more black beans and less zucchini.  Using 3 zucchinis is definitely excessive, so I'd go for maybe 2 zucchinis and 1 cup of black beans.  That would probably help to give it a little more sweetness (which I always love) and enhance the Mexican feel of the dish.

Now, on to some serious business.  Colin and I agreed on the grade for this one but, when looking at the quesadillas of the past, realized that it definitely outstrips the Salmon and Brie Quesadilla (which initially received the same grade we intended for this one).  The end result?  Salmon and Brie has been demoted.  Check out The Leader Board to see where it ranks now (or just follow the link to that post).


FINAL RESULTS:


Sandwich:
Black Bean, Zucchini and Monterey Jack Quesadilla
Gooey-ness:
4.5
Aroma:
2
Appearance:
A green and white interior makes for an interesting color combination.
Taste:
B


Gooey Scale
Aroma Scale
1 = still cold/hard
1 = can’t smell a thing
2 = slightly melted but still firm
2 = tender waft
3 = melted evenly
3 = makes your stomach growl
4 = melted and slightly runny (starting to get those cheese strings between your sandwich and your mouth when you take a bite)
4 = strong scent
5 = runny
5 = overpoweringly pungent
6 = sloppy mess!


As mentioned, it was a little bland, but still good.  Colin said it best when he observed "There hasn't been a sandwich using jack cheese that I haven't liked."

Wednesday, February 15, 2012

Mascarpone Ganache Grilled Cheese

Just in time for Valentine's Day the Day After Valentine's Day, I bring you a perfect dessert grilled cheese treat.  I'm not sure about you, but for me Valentine's Day itself was actually pretty anti-climactic.  Sous chef was called away to NYC for business and left me all by my lonesome :-(  Fortunately, I was well stocked and able to turn to my favorite intoxicant to give me solace-- dark chocolate.

Awhile back my friend Whitney shared with me a link to a fancy restaurant in New Orleans that was serving up a triple creme cheese with dark chocolate ganache grilled cheese.  This sounded like a great way to combine my two loves, so I flagged it in my inbox to try at a later date.  Well, what better date than Valentine's Day?

After a cursory Google I confirmed that it is, in fact, possible to make ganache using mascarpone cheese instead of heavy cream.  This was all the information I needed to plow ahead with little further thought!


Since I spent so little time conceptualizing the sandwich, the ingredients were very easy to assemble.  I had some leftover white bread from last week so added to that some mascarpone and dark chocolate chips and was ready to go.  I also kept some heavy cream on hand in case things went awry with the modified ganache.


Step one was putting 1/3 cup mascarpone into a saucepan on medium low (emphasis on low) to melt.  This happened shockingly quickly.  On a whim I decided to add 1/4 tsp of vanilla extract just to affirm that this mascarpone was destined to be sweet, not savory.


While that continued to melt together I measured out 1/2 cup of Ghirardelli 60% cacao chocolate chips.  Shortly thereafter the cheese was all melted and starting to bubble a bit.  This meant it was warm enough to combine with the chips.


I poured it over on top of the chips and started stirring the two together.


Until it formed a super creamy and delicious ganache!


That was about all the prep that was needed aside from spooning some of the ganache onto one of the slices of bread and creating a sandwich.


I lightly buttered each side of the bread and put the sandwich in the pan on low heat.  I wanted to make sure to keep the temperature on the lower end so as to not make the ganache too hot and runny.  After a few minutes both sides were lightly toasted and ready to go. 


But what would a Valentine's sandwich be without a little heart? ;-)  I also spooned a little decorative ganache on top to complete the effect.


Taste Review:

Some of you may recall that I've already ventured into chocolate grilled cheese territory, but last time it was with Nutella and goat cheese-- which was sweet, but had a sharp bite after taste.  This time, there was still a strong chocolate flavor, but it was nothing but super sweet!  The crisp crunch of the bread gave it a little different texture/flavor, but the chocolate was BY FAR the dominant element.  Even though this sounds like a recipe for a cake, the crispy bread and light butter taste made it clear that this is its own unique entity-- a sort of cross between a sandwich and a cake.


One modification I would make, were I to make this again, would be to cut off the crusts.  I remember GGC suggested doing this for the hazelnut goat cheese melt because it creates a sort of seal around the edge of the bread.  This may be the case, but I would opt to do it more because the chocolate to crust ratio was off (not enough chocolate around the crusty part). 

The key takeaway here is that this sandwich was RICH!  I always contend that there is no chocolate item in existence that is too rich for me, so I could handle it, but I can see where someone with a lower chocolate tolerance might be in trouble.  This is certainly not for the faint of tongue :-P

FINAL RESULTS:

Sandwich:
Mascarpone Ganache Grilled Cheese
Gooey-ness:
5 (runny inside, but not too messy)
Aroma:
2
Appearance:
Dark filling gives an interesting contrast to the white bread.
Taste:
B

Again-- I liked it, but since it was so rich and may not appeal to the masses I'm not giving it as high of a grade as I could.

Gooey Scale
Aroma Scale
1 = still cold/hard
1 = can’t smell a thing
2 = slightly melted but still firm
2 = tender waft
3 = melted evenly
3 = makes your stomach growl
4 = melted and slightly runny (starting to get those cheese strings between your sandwich and your mouth when you take a bite)
4 = strong scent
5 = runny
5 = overpoweringly pungent
6 = sloppy mess!


Thursday, February 9, 2012

Mozzarella Stick Grilled Cheese

At long last work has calmed and I'm back and cooking with gas (ba dum ching)!  I'm grounded on the travel front until May, which means ample uninterrupted grilled cheese time :-)  Since it was my first time back in my home kitchen in quite awhile I decided I needed to return with a bang.  While GGC rarely steers me wrong, I didn't see anything jump out at me to indicate that it was appropriately exciting for my triumphant return; so I turned to the interwebs and found Martha Stewart's recipe for Grilled Mozzarella Sandwiches.  They basically look like some sort of cross between french toast/grilled cheese/mozzarella sticks; but they sounded mighty tasty and there was even a video of her making some with Mario Batali, so with two expert recommendations I decided it was definitely worth a go.

This recipe actually reminds me of one that I was really into one summer back in my elementary school days (in fact, maybe it's the same recipe).  I was hooked on making this sandwich, or one very much like it, all summer both because it was tasty and because the ingredients were so easy to come by:


White bread, 2 large eggs, 1 lb fresh mozzarella, 1/2 cup heavy cream, 1 tsp. thyme leaves, and a pinch of salt.  The recipe also calls for a grinding of nutmeg, but that sounded kind of weird to me, so I skipped it.

The first step was to slice up the fresh mozzarella and distribute it evenly over four slices of bread and then complete the sandwiches with another four slices of bread. 


This is all you need to make the actual sandwich, but the recipe also suggests that you cut the crusts off of each sandwich (this reminded me of PB&J sandwiches for little kids-- look how cute they are).


Once the sandwiches were ready I mixed up the "batter" to dip them in.  First I whisked 2 eggs together.


Next came the half cup of heavy cream and the teaspoon of thyme.


While I was mixing up the batter I had been letting the pan heat up with 2 Tbsp of olive oil in it.  Once I could see the oil starting to smoke I added 1 Tbsp butter (the model of a healthy meal, right?) so that the pan was fully ready for the sandwiches.  I coated the first sandwich in the batter (making sure to fully cover both sides) and dropped it into the pan.


That first instant in the pan made me think of a deep fryer-- the oil and butter had gotten so hot that the sandwich started hissing as soon as it made contact with the pan. 


The recipe says to cook the sandwich for 2 minutes on each side and the beauty to me was that, since the bread was so saturated with the batter mixture, it was hard to burn the sandwich-- so even if I left it on one side for a little too long it was no big deal, it just made it a little crispier. 


There wasn't really a need to cover the sandwich while cooking because the cheese was literally right up to the edge of the bread and was prone to getting melty and starting to ooze out.  Watching this happen did leave me wondering why the recipe advised me to cut off the bread crusts.  I'm not sure I really see an advantage to doing so.


The cooking process is what really sealed the deal in my mind that this is basically a mozzarella stick in sandwich form.  Wouldn't you agree?  I do love mozzarella sticks, so I couldn't wait to try this one!

Taste Review:


The first bite tasted like a very creamy and salty piece of mozzarella cheese meaning the cheese is definitely the star of this sandwich.  But, while the cheese itself tastes salty, the rich egg/cream batter gives it a hint of sweetness to balance things out.  Add to that the subtle flavor of the thyme and you have a relatively complete, albeit mild, flavor profile.  The recipe was definitely simple, but not in a bad way. 

Colin, as usual, wasn't satisfied by the simplicity of the sandwich and opted to dip it in marinara sauce.  I tried this as well and must say that marinara sauce on the sandwich solidifies the comparison to a mozzarella stick.  In fact, with the marinara sauce it was virtually impossible to distinguish the sandwich from a mozzarella stick.  One minor difference, though, is that the crust on a mozzarella stick is crispy and crunchy, but the bread on the sandwiches was mushy no matter how long the sandwich had been cooked (some were in the pan for longer than others).  Not to say either way is bad, they're just different.  I like the softer texture for a sandwich, so I was happy.

One complaint we had was the consistency of the cheese.  It ended up being stringy and rubbery instead of gooey and smooth.  As you tried to eat, full chunks of mozzarella would come out with each bite if you weren't careful.  Part of me wonders if this could've been avoided if I had heeded my own usual advice and grated the cheese rather than slicing.  Oh well, lesson learned for next time.

Action shot of the stringy effect.

FINAL RESULTS:


Sandwich:
Mozzarella Stick Grilled Cheese
Gooey-ness:
4.5 (stringy, not gooey)
Aroma:
2 (smells like frying, but sandwich doesn't have its own aroma)
Appearance:
Looks like a mozzarella stick.
Taste:
B+

While gooier cheese would have been better, overall I can't complain-- this was a winner (but definitely on the fattier end-- I recommend eating sparingly)!